Little trinket trays, that can be used for storing jewellery and small items around the house like spare change, lip balm and keys, are great as part of a gift - especially when paired with your gift to go inside them. Making one by hand makes that gift even more special!
I'm by no means an expert in working with these materials - but here are some ideas for how you can create unique designs for your trinket tray. These 3 ideas all use the same silicone mould - but by using different materials, and decorating them in different ways, you can make your own one of a kind end result. If you're interested, the mould I used is called 'Small Bowl' from Barnes Australia, and is roughly 83mm x 35mm.
First, let's start with clear resin!
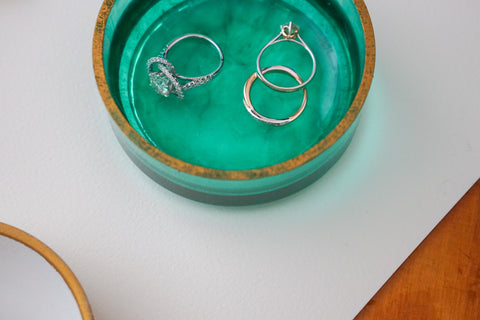
I love the jade-style effect I got for this tray, and it's super easy to do. Mix your resin as per the bottle instructions (every brand will need slightly different proportions of the ingredients), stirring slowly but carefully to try and minimise bubbles. Don't stress out too much about the bubbles though - they're really hard to eliminate entirely, and having a few in your tray isn't the end of the world, they just add to the texture. Add a drop of your colouring - I used a translucent emerald shade. Now the key here is to not fully mix it in, to create the marbling effect. The act of pouring resin into your mould will also mix it a little, so try to leave it even less mixed than you would like before you start pouring.
Pour into your mould, and let it cure as per your bottle instructions, ensuring it cures in a well ventilated area. When it's done, remove from the mould, and it will look something like this!


You can leave it like this if you would like, but I wanted to add a rustic golden rim. For this I used a rub on gold leaf called Rub'n'Buff from Amaco, but you could use any gold leafing or gold coloured paint. What I like about the rub on products is they leave a smoothed rustic effect, but paint would be better for a solid rim.
Now, let's talk about plaster!
For these two trays I used a plaster of paris (also known as gypsum), but you could also use a concrete mixture. Both are powders that are quite cheap to buy, and then you mix with water at home. They are very quick to set - which is great on one side, but also means you need to move very quickly as you work.

The two tone effect on this tray is super simple - we start by mixing up a small amount of plain plaster with no colour and pour this halfway up the mould. Let it set partway (if you don't let it fully set, you get a better bond between the two halves) while you mix up another batch of plaster. Add colour to this half - if you want a really bright colour, you'll need to use opaque dyes. As I wanted a subtle colour, I used a transparent emerald dye, and not much of it - but this means you get a really pale result. All depends on what you're looking for! So, now we pour in the second half and let it set.
Note: depending on the setting time of your plastic, you could potentially just mix up one batch, split it in two, and add dye to one half. The setting time of the plaster I used was too short for this, as the coloured half would have already been setting while I was still working with the first half!
As with the resin, you can see I wasn't too bothered by creating bubbles, as I really like their natural texture. This is just a matter of opinion - you can lessen these by stirring slowly to try and reduce bringing more air to your mixture, and by banging the container onto the table to bring the bubbles to the surface.
Another idea with plaster...

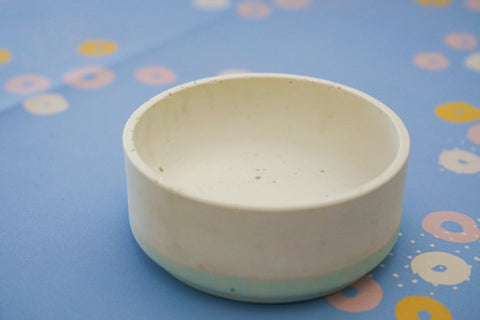
Now moving onto a variation on this plaster tray...to be 100% honest, I made this by mistake! In my first run of creating a two tone tray, I messed up my measurements when making the first layer, and after I removed it from mould it crumbled, just leaving the bottom. Which turn out to be a blessing in disguise, as it made the adorable shorter version.
This is why I say don't stress out about things like bubbles - the joy of making items by hand is in individual variation, to embrace your mistakes as part of the process!

This tray is made from a plain plastic of paris - I love how to smooth, white finish gives a clean ceramic look. This is what my tray looked like after I brushed off the top layer - you can use some fine sandpaper to smooth down all the surfaces. Then, paint your rim with gold to make it feel more luxe - this time I used a liquid gold leaf paint, again from Amaco. But you can use any metallic paint you already have, or really any colour you have at home at all.

These are just some starter ideas - I'd love to see how you go creating your own trinket trays! Just share your pics over at Instagram at @the.artful.pea
Please keep in mind that both resin and plaster are not food safe - so these shouldn't be used to store or serve snacks to eat!