
Kaya Butter Toast is one of my favourite local breakfasts in Singapore...so naturally, I had to recreate it's iconic flavours and textures in a cookie! We're going to make a shortbread base, kaya icing, and top it off with a toasted white chocolate crumb.
Double Butter Shortbread
The unadulterated flavour and texture of butter is an iconic part of kaya butter toast (I mean, there is a reason why it is in the name). Rather than being spread evenly across the bread, you bite into chunks as you munch. So, the only way to truly honor it is with ridiculously buttery shortbread that melts in the mouth.
- 113g unsalted butter, softened
- 40g icing sugar
- 1/4 tsp vanilla essence
- 100g plain flour
- 60g arrowroot
- 15g milk powder
- 1 tsp salt
1. Cream together butter and sugar in a mixer, mixing for approximately 3 minutes or until light and fluffy.
2. Mix in the vanilla until blended.
3. Stir together dry ingredients in a separate bowl, and sift them over the butter (milk powder can sometimes have lumps, so make sure they get sifted out if there are any! Lumps will go crunchy when baked to give you a chunky / grainy texture.)
4. Mix as little as possible to limit gluten development (ie, keep them light and mouth melty) until the dough only just comes together. Turn the dough out onto a silicone sheet or glad wrap and press into a flat disc. Chill in the fridge for at least an hour to let it rest (buttery dough can be super tricky to roll out, especially in hot climates, so chill to save your sanity).
5. Preheat oven to 160C/320F fan forced and roll out the dough with a floured rolling pin to about 6mm (1/4") thick. Cut into 5cm (2") squares and bake for about 14-15 minutes or until lightly coloured.
6. Cool the biscuits thoroughly before icing.

Kaya Icing
- 145g royal icing mix (This is a premix of icing sugar and egg white powder / meringue powder that you can commonly find in baking shops or the baking section of supermarkets. Personally I find the icing it makes isn't quite crisp as from scratch, but is so worth the convenience!)
- 20mL water (Depending on your premix you may need to tweak this amount, so read your pack instructions. We want to create a thickened icing, so should be less than recommended to make flooding icing.)
- 40mL kaya spread
- 1 drop pandan paste (Trust me, this stuff is potent. This will also give the green colour.)
- Up to about 5-10mL coconut milk (optional)
1. Mix icing mix and water on high speed for 2 minutes until thick and voluminous. If this is the first time you're making royal icing with your mix, I recommend adding only a little water at a time so you can stop if you reach the desired consistency before you use the full amount. We're adding more liquid in the next step, so go slow!
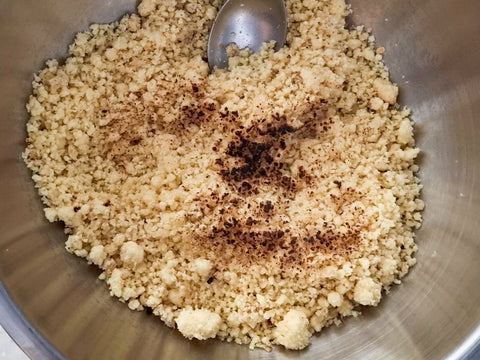
2. Add kaya and pandan paste and mix again. For flooding we need the icing to be '15-20 second consistency'. This mean that if you drag a knife or chopstick through the icing, it should take around 15-20 seconds for the line to disappear. If it takes longer, you need to thin it. If it takes less, it's too runny, so add more icing mix.

Adding the kaya and pandan to the icing
3. If you need to thin the icing - add a few mL of coconut milk to enhance the kaya flavour. If you don't have coconut milk, water is fine too.
4. Once you're happy with the consistency, pour into a piping bag and you're ready to go! Pipe around the outside to create the edge, and then fill in the middle. You can also keep it in the fridge overnight in a sealed container before piping if that suits your schedule.

White Chocolate Toast Crumb
In traditional kaya toast, the bread is toasted over a charcoal grill for extra flavour. To give those charry notes, we're going to use a kitchen blowtorch.
- 20g panko breadcrumbs
- 10g milk powder, plus 5g extra to add in later steps
- 1/2 tbsp cornflour / cornstarch
- 3/4 tbsp caster sugar
- 1/8 tsp salt
- 25g unsalted butter, very soft but not melted
- 20g melted white chocolate, cooled (optional to add another 20g after the final step)
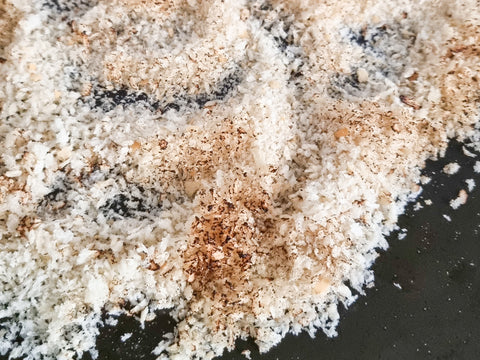
1. Spread out the breadcrumbs on a baking tray and torch them with a kitchen blowtorch. The idea is to do this unevenly - you want some left raw, some lightly toasted, and some lightly blackened. If you don't have a torch, toast them under a hot oven grill element (watch carefully - we're only trying to get a toasty flavour note, not to burn them all!)
2. Transfer the crumbs to a bowl and toss to cool them off. Add the dry ingredients and stir until evenly combined, then mix through the butter to create a rough crumb (it may be easier to use your fingertips here).
3. Spread out on the baking tray and bake at 120C (250F) for 25 minutes, or until lightly browned and crisp (note, they'll only crisp up as they cool so you'd need to pick some up with a spoon and let it cool before you taste test for the crunch).
4. Leave the crumbs to cool completely.
5. Toss the crumbs in the extra 5g milk powder. Pour over the melted chocolate and mix thoroughly.
6. Ensuring your crumbs are in a heat safe environment (ie, bowl and benchtop protection) use your blow torch to charcoal some of the top crumbs. Stir through and torch again until you are happy with the degree of toasty flavour.
7. Taste for sweetness - if you'd like them sweeter, toss in the second 20g of melted white chocolate!
To bring everything together, ice the shortbread and let it sit to flood across the cookie evenly. When it has started to dry, sprinkle on your desired amount of crumb. Royal icing will take a few hours to set, depending on your local humidity and temperature. If you want to speed up the process, leave the cookies in front of a fan!
These cookies will keep for a few days in an airtight container. Please note that due to their high butter content, they will soften over time and get more delicate, so they are better eaten faster (I mean, aren't all cookies?!)
